En:Deposit accounts
The deposit accounts function allows you to manage deposit items, add and sell orders and always keep an overview of the stocks and the deposit items in circulation. You can track this down to the customer. The function is available for you as of the complete package.
Activate deposit accounts
In order to create and use deposit items, the function must first be activated via the settings. Activation takes place under System - Settings - Orders - Activate deposit items / juice accounts. To do this, tick "Activate deposit items/juice accounts" and save this process. You also have the option of displaying the deposit items/juice accounts as an icon both in the order and in the cash register in order to be able to access the functions even more quickly. Please specify another title for "Title for auto field output", e.g. for identification on receipts (example: overview of deposit accounts).
Create deposit items for sale
To create a deposit item, first create a new item as usual (under "Item - New item"). Read here how to Create a new article. Assign an article number and an article name corresponding to the deposit article (example: 6-box). Under the item "Packaging" you can select "Piece" as the type of packaging in the drop-down menu. In the next step, save the new deposit item at the bottom. You will now be forwarded to the item file of the newly created deposit item.
Allocate price
If your customers incur costs when taking the deposit item with them, you can assign the corresponding price to the item, also as usual. You can read how to assign prices and price groups to an article in the article Article index card.
Designate article as deposit article
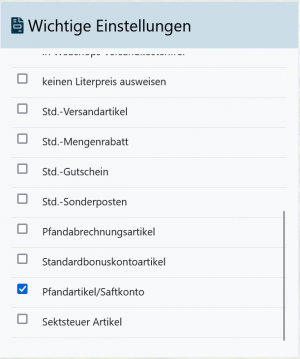
In order to determine that the newly created article, unlike the rest of your articles, is a deposit article, tick "Deposit article/juice account" in the item "Other settings".
Create deposit item for redemption
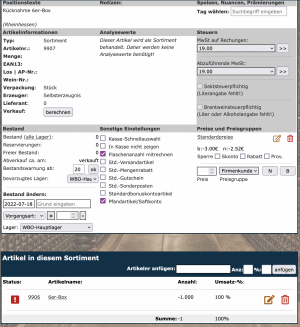
In order to be able to take back deposit items in addition to selling or lending them and to book them in the programme, a deposit item for taking back must be created to match the deposit item for giving away. Create a new article for this as before (example article name: return 6-box).
Note: Here it is very important that this article, unlike before, is created as an assortment.
For this purpose, tick the item "Packaging & Miscellaneous" that this item is to be treated as an assortment. Save the deposit item for return.
Assortment settings
In order to create a stock increase by the exact number of deposit articles to be taken back when the deposit article is taken back, the assortment for the deposit article return must be linked to the original deposit article. You can do this in the article index of the assortment you have just created in the "Data" tab under the item "Articles in this assortment". To do this, insert the number of the deposit item (for lending / selling) and with a click on the green finger, assign this item to the assortment for return. Then enter a - 1 for the number. Enter 100 for the share (%) and then click on add.
Note: The negative sign plays a particularly important role here! Make sure that you put a minus in front of the number. With this setting, when this assortment is sold (when it is returned), the stock is automatically increased by one.
Price awarded
Erheben Sie für den regulären Pfandartikel für den Verkauf / die Ausleihe einen Preis, muss für den rücknehmenden Pfandartikel ein entsprechend negativer Preis vergeben werden. Tragen Sie also ein Minuszeichen vor den Betrag in das Feld „Preis“ und wählen Sie die gleiche Preisgruppe aus, wie bei dem regulären Pfandartikel.
Hinweis: Auch hier spielt das negative Vorzeichen eine wichtige Rolle! Achten Sie darauf, dass Sie für den Preis ein Minus vor die Zahl setzen. Beispiel: Das Pfand für die 6er Box kostet 3 Euro. Somit muss der Preis für die rücknehmende 6er Box -3 € betragen.
Sell deposit items
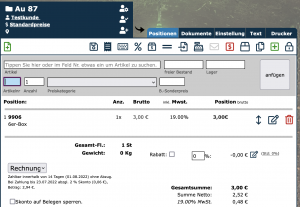
As usual, create a new order for the corresponding customer for the desired items and add a suitable deposit item (deposit item for the sale, e.g. the box of 6), which you want to give to the customer and thus initially sell as a deposit. Once all items have been added to the order, create an invoice as usual. Here you can read how to create a New Order, how to add an item to the order and here how to create Documents for an Order. (e.g. invoices).
Show deposit items on the invoice
So that customers can also see their deposit account balance on the invoice, you have the option of outputting an overview of the deposit account (quantity and associated deposit items) by means of an auto field in your invoice text. For this, use the auto field [Deposit account customer]. You can also look up all auto fields here.
Take back deposit items
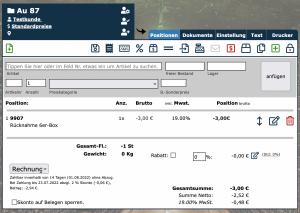
Also create an order for the return of a deposit item for the customer who returns the deposit, so that this movement can also be booked and the account balance of the deposit item is updated. For this, add the assortment for the return of the deposit item (e.g. return 6-box), which you have created as described above, and book this with the number of deposit items returned accordingly. Also create an invoice here to book the return according to the returned deposit items.
Overview of the pledge accounts
The practical overview of the deposit accounts, which you can find under Articles - Stocks - Deposit accounts, offers you the possibility of displaying all deposit account balances and deposit movements of all customers to whom you have handed over a deposit item or received it back from them and booked it per invoice in an overview. In addition to the article name, the article number, the corresponding customer and the status of the account (i.e. the number of deposit articles at the customer's premises), you can have the individual movements for this account displayed statistically in a table by clicking on the symbol on the far right of each line under "Movement".
Note: A negative sign in "Account balance" indicates that a certain amount of the sold deposit item is still with the customer.
Overview of the deposit accounts in the customer file
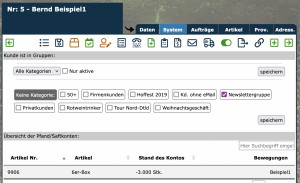
You can also track the movements and an overview of the deposit accounts of a specific customer in the customer file To do this, go to the System tab in the customer file. There you will also find a table under "Overview of deposit/juice accounts", which shows the most recent status of the deposit account of the corresponding customer.
Overview of the deposit accounts in the order mask
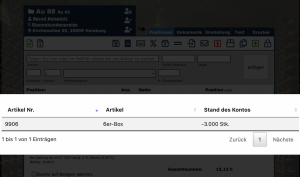
If you have set in the system settings that "Deposit items/juice accounts in order are displayed as an icon", you have the option of displaying the status of the deposit account for the customer of the order by clicking on the corresponding icon in the order mask.
Overview of the deposit accounts in the cash register
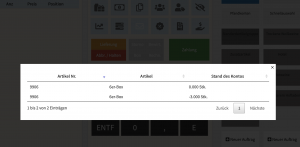
If you have set in the system settings that "Deposit item/juice accounts are displayed as an icon in the cash register", you can click on the "Deposit accounts" field on the right-hand side of the cash register to display the status of the deposit account for the customer of the cash order.

